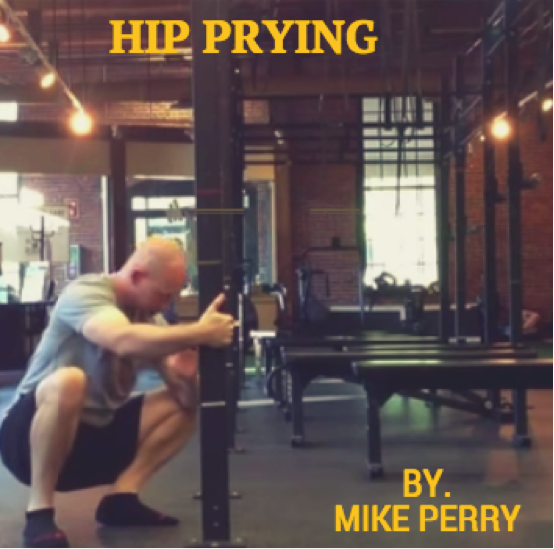
Hip prying. You should be doing this! Yes, you.
Hip prying might be one of the quickest and most effective hip mobility drills that I know exists. In just a few minutes, I’ve seen clients go from barely being able to squat at all to squatting below parallel!
Steps to Perform Hip Prying Mobility Drill
1. Determine a comfortable squat stance. Hip width is a great place to start.
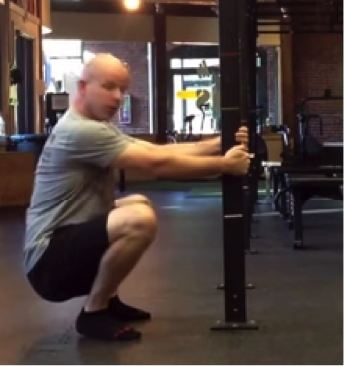
2. Grab a cage with two hands and fall back into a deep squat.
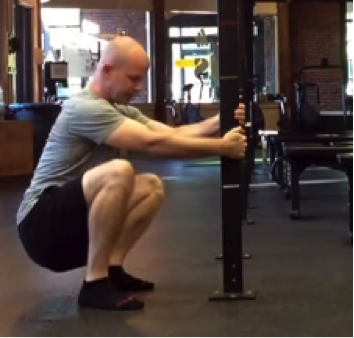
3. Once you’re in the bottom position, shift your weight side-to-side and explore the deep squat position.
4. Try driving your knees outward and shifting your weight forward and backward as your body gets acclimated.


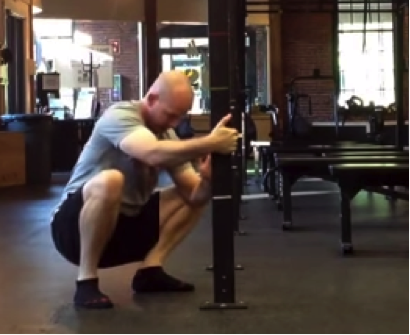
5. Grab the cage with one hand while the other arm assists you as you open up your hips. If you’re holding on to the cage with your right arm, take your left elbow and drive your knee over your pinky toe, all while getting a great stretch in the adductor.

6. The final part of this drill is to utilize this newfound hip mobility to own the bottom position with a nice neutral spine. Keep your body weight centered in the middle of your feet and work towards being able to hold on the bottom position without assistance.
Video of Hip Prying with Coaching
Takeaways
1. Spend a minute or so exploring the deep squat position. Make sure that your heals stay down for the duration!
2. Hold on to the cage with one hand and perform some assisted mobility drills by driving the elbow over the knee and stretching the adductors. Start with :30 to :45 seconds per side.
3. Focus on a nice tall spine as you continue to open up the hips. As you start to load the squat pattern, it’s important to maintain a neutral spine! Once you can hold this position, perform multiple sets of :10 to :15 second isometric holds in the bottom position.
Other Recent Hip Mobility Posts
Improve Your Pistol Squat (combines hip and ankle mobility!)
Try this out and let us know how it goes!
