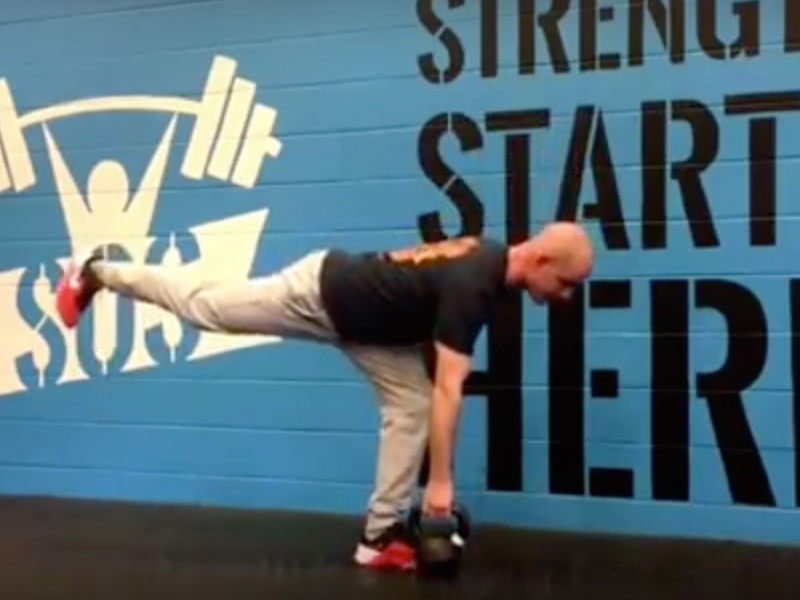
Unfortunately, it’s common to see this in the fitness industry. Most people chase the flashy exercises before owning the fundamentals.
If you’re a coach, here’s a quick thought process to use when prescribing any exercise to your client.
- Why should this be in the clients program?
- Are they actually ready for this exercise?
- How will this benefit them?
- Is there any concern for injury?
In other words, should your client really be doing this exercise right now?
When possible, I try to create a logical progression for every exercise, simple to complex. This is vital if for my clients who want to move on to exercises that require a higher level of mobility, motor control, and coordination.
For any exercise, the teaching progression should be simple. Start with the most basic and slowly add complexity. If you progress at the appropriate rate, there will be no need for regressions.
So, if your goal is to eventually use a single leg deadlift with your client, where do you start and what is the progression?
I’ve got you covered.
Progression for Single Leg Deadlifts
- Traditional deadlift with 2 arms
- 1-Arm deadlift
- Staggered stance deadlift with 2 arms
- 1-Arm Staggered stance deadlift (contralateral)
- Single leg deadlifts with 2 arms
- 1-Arm Single leg deadlifts (contralateral)
View the single leg deadlift progressions in this simple video.
Key Points for each Exercise in this Single Leg Deadlift Progression
Let’s quickly dive into some key points to each exercise.
Deadlift with 2 arms
- Symmetrical stance
- Neutral spine
- Even weight distribution through feet
- Adequate hip hinge
- Ability to demonstrate trunk stability
1-Arm deadlift
- Symmetrical stance
- Neutral spine
- Even weight distribution through feet
- Adequate hip hinge
- Anti-rotational in nature
- The arm holding the kettlebell is close to the ribs
- Ability to demonstrate trunk stability
Staggered stance deadlift with 2 arms
- Asymmetrical stance
- Neutral spine
- The majority of the weight should be in the front foot
- The back foot is for stability purposes
- Square shoulders
- Front foot should be placed in between the kettlebells
- Ability to demonstrate trunk stability
1-Arm staggered stance deadlift (contralateral)
- Asymmetrical stance
- Neutral spine
- The majority of the weight should be in the front foot
- The back foot is for stability purposes
- Square shoulders
- Front foot should be placed in between the kettlebells
- Grip the bell with the opposite hand that is between the kettlebells
- Ability to demonstrate rotary stability
- Ability to demonstrate anti-rotation
- Ability to demonstrate trunk stability
Single leg deadlifts with 2 arms
- Single leg stance
- Shoulders are square
- Adequate hip hinge
- No Valgus collapse in the knee
- Shoulders and hips square
- Two kettlebells provide a symmetrical grip and load
- Ability to demonstrate anti-rotation
- Ability to demonstrate rotary stability
- Ability to demonstrate trunk stability
1-Arm single leg deadlift- (contralateral)
- Single leg stance
- Asymmetrical grip contralateral)
- Shoulders are square
- Adequate hip hinge
- No Valgus collapse in the knee
- Shoulders and hips square
- Ability to demonstrate rotary stability
- Ability to demonstrate anti-rotation
- Ability to demonstrate trunk stability
Above are some basic bullet points on what you should be looking for in the suggested single leg deadlift progression. Like anything, the Devil is in the details and a good coach can help you decide when to progress onto the next step.
How and When to Implement These
Single Leg Deadlift Progressions
Remember, this is about quality and not quantity. Own each step of the progression and move on when ready.
Here’s a simple guideline to use as far as sets and reps go. If you, or your client, can perform 3-4 sets of 5 reps of an exercise with a respectful weight, I’d say its safe to attempt the next progression.

